"Looks like I have something to learn from a seminary for a change..."
Other Level Resources
-
Loot Map - Go here for a complete
listing of all the loot locations.
-
Secrets & FAQ Page - Go here for pictures
of all the secrets in this level, as well as some frequently asked
questions.
TABLE OF CONTENTS (click a topic to jump to that section)
- Getting In & The Conversation
- The Barracks & The Acolytes' Quarters
- The Workshop
- The Catacombs
- The Storage Shed
- The Chapel
- The Chapel - Second Floor & Towers
Starting Objectives:
- Be at one of the
meeting room doors to
overhear the conversation
between Karras & Truart at
midnight (don't worry about
the time - the bells will chime as you approach the
door).
- Return to the front gate when you're done
- Don't kill anyone
Ending Objectives:
- Steal the safety deposit box key from its stated location.
- Make a
wax impression of the key.
- Return the
key to its original location.
Loot Information:
-
Requirements: At least 1200
- Available: 2119
- Accounted For: 2119
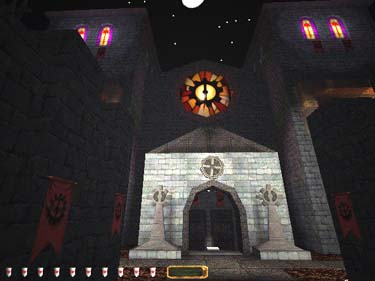
Getting In & The
Conversation
Go left in the yard. Be
aware of the guards in the
towers overhead and the
mech beast roaming about.
If you've yet to encounter
one of these, 2 water
arrows to the rear boiler will
take it out of commission, or
a fire arrow or mine (which are obviously much noisier methods). Continue south
until you reach a metal door
on your left. There is a
'servant' in here - it can be
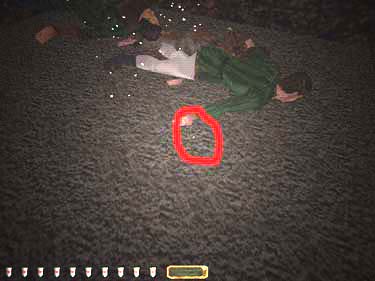
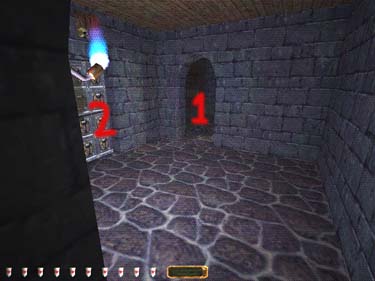
easily blackjacked (even if it sees you). Grab
the purse on the male
corpse, then throw the
switch at the bottom of the
other doorway (figure 1)
revealing a secret room
with a hard-to-see ring near the male
corpses hand (figure 2).

|
|
|
Figure 1 |
Figure 2 |
Go out through the other
door and head east to a
narrow walkway with a
tomb. Just south of here is
a staircase with the door
your looking for. Get up next to it and lean into the door. Now be patient and
listen to the ENTIRE conversation - the location of the safety deposit
box key is mentioned by Karras. There are as many as 14 different locations
where the key can be found, so pay close attention. If you don't catch the
location, don't worry - you'll eventually find the right one.
The game randomly
generates the location each
time, assigning the
completed objective to one
of these locations. It is
imperative that you listen
for the location near the
end of the conversation,
and remember where you
got your key from, as you
will be required to return it
to that location before
leaving.
The
Barracks & The Acolytes' Quarters
Enter this area via the
outer south door and go up
the nearest set of steps to
the barracks. There is a
mechanist patrolling the
upstairs areas here, but the
downstairs area is safe. Check
the dresser at the foot of
the stairs for a key and a goblet. Use the
crawlspace (figure 3) to get to
the acolytes' quarters,
stopping to get the gold
coins from the box. The
dresser beyond is a key
location, and there are
some jeweled cups on the
far bookcase. Back in the
main corridor, the second
chair on the left contains a
purse worth 25 gold.
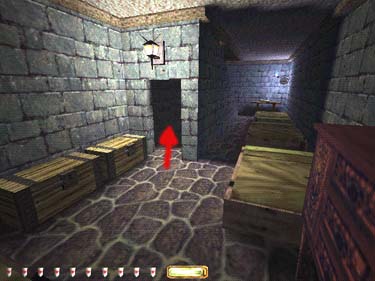
Figure 3
The
Workshop
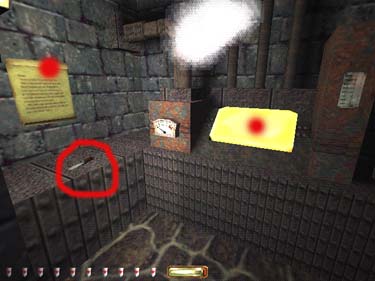
Once you have obtained
your key, use the staircase
in the Meeting Hall area to
go downstairs. When you
reach the gas light, you'll
hear a conversation in the workshop (figure 4, #1 is the workshop entrance -
figure 4, #2 is the catacomb entrance).
Grab the statue under the
stairs and wait until the mechanists leave. There is a
drone in the workshop (1
water arrow to the boiler
will take him out). Go
clockwise through the
workshop to the last room
on the left. Read the
instructions on the wall to make the key impression (figure 5).
|
|
| Figure 4 |
Figure 5 |
The
Catacombs
There are two haunts in
the Catacombs, but the
best way to find all the loot
down here is to consult the
Loot Map for this mission.
There is a ladder in a room
on the southwest corner
leading up to two more
crypts. From here, you can
go to east to the ladder
leading up to the roof (figure 6) or you can take the
northwest steps up to the
chapel (which is not recommended, due to the number of guards in the chapel).
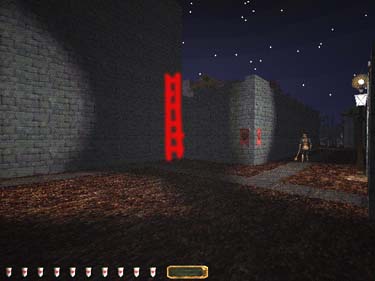
Figure 6
The
Storage Shed
Climb the ladder to the
roof (figure 6 above) and run to
the open door (beware the
patrols up here). Grab the
key (if needed), and the
other loot in the room, as
well as the coins in the
crate and the jeweled cup
on the turret near the
corner. From here you can
go through the west door into
the second floor of the chapel.
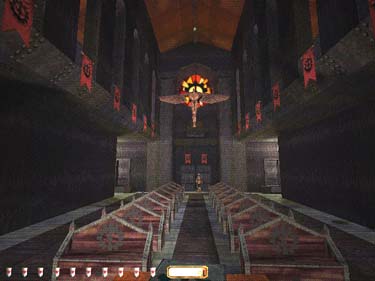
The Chapel
Easily one of the most
complicated areas in the
game. Well lit, well
guarded, and lots of noisy
surfaces. The best entry
point is the East side from
the Barracks corridor. From
here, you can sneak to the
nearest closet, or hide in
some shadows on either
side. There is a guard near
the front doors, a guard on
the west side, two patrols,
and a mech beast that
makes a pass every once in
a while. Timing is
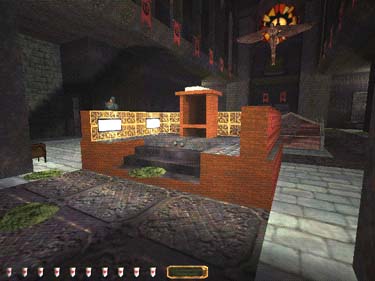
everything. When the coast
is clear, shoot a few moss
arrows at the altar, from the
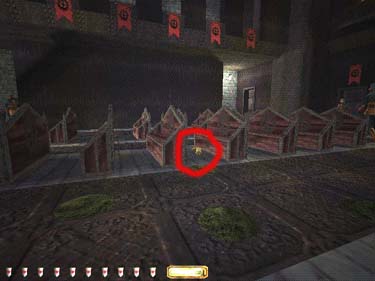
safety of the shadows (figure 7). You should be able
to crouch and run up to
grab everything (don't
forget to use your forward
lean key if necessary). Then head back to the safety of the nearby shadows. Sneak
across to the other closet,
grab the key (if needed)
and the offering plate under
the table. Go back to the far
shadow of the other closet
and crouch/run midway
down the wall until you can
see a papyrus and tiara between the pews (figure 8).
|
|
| Figure 7 |
Figure 8 |
Shoot a moss arrow,
then quickly run and grab
the tiara. This should be
the last thing you do in the chapel - most likely the front
door guard will come
looking for you, so make
sure you're headed completely out of the area
once you do this.
The Chapel
- Second Floor & Towers
Grab the idol on the
bookcase and go west to Karras' quarters (don't
forget to look around upstairs). Go north to the
west tower and slip into the
shadow left of the door.
Shoot a moss arrow
somewhere nearby (so you
can jump to it when you
come back up the ladder).
Use the narrow hall to go
east to the other tower
where you can use the
same trick. Go back the
way you came, or slip
behind the guard in the
east hall. Go back outside
and south to the front
gates.
Back to Index / Back to Ambush! / Forward to First City Bank and Trust
Travel to: Keepers' Chapel / Strategy Index /
Thief-TheCircle.com (home) / Go Back